

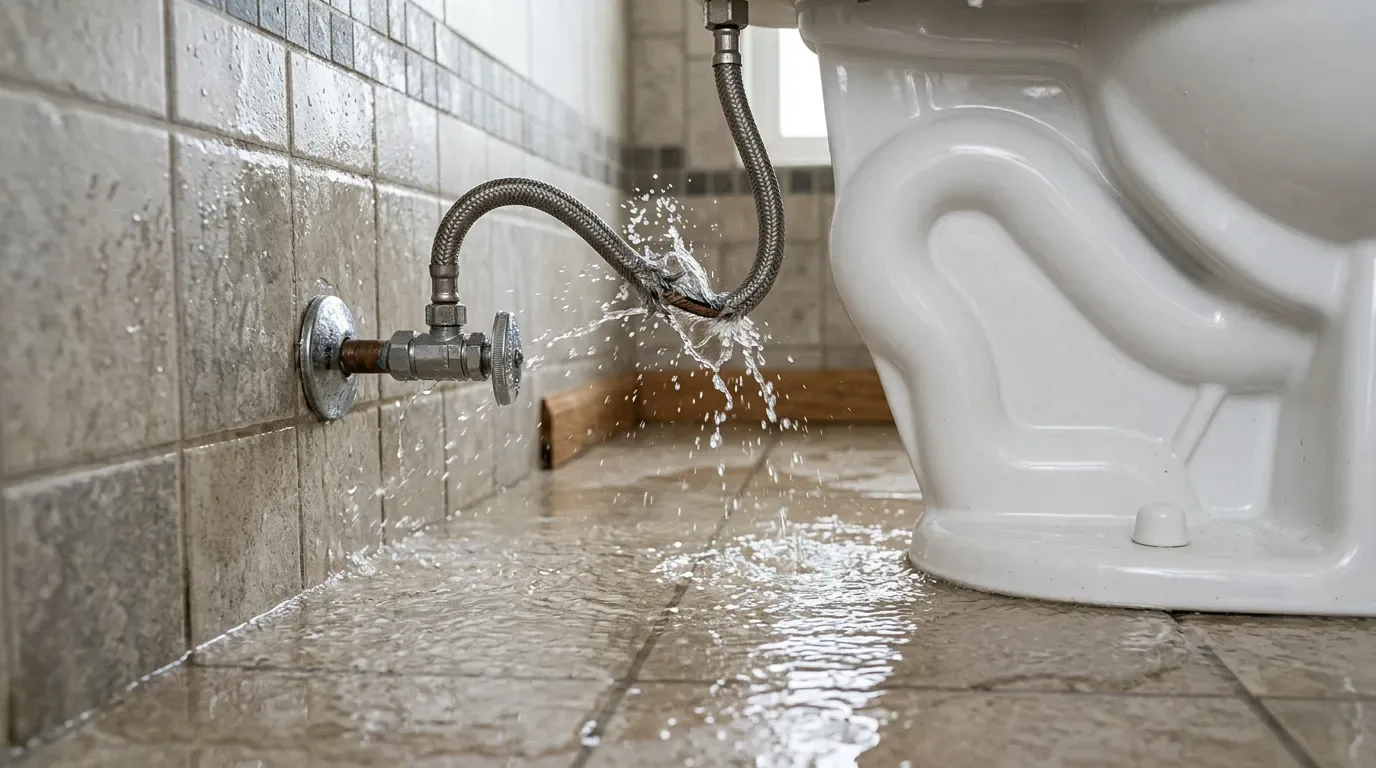
The supply line behind a toilet is a short flexible hose, usually no longer than a foot or two. It runs from the stop valve on the wall or floor to the fill valve under the tank. Most people never look at it. But it holds full house pressure all day and all night, and when it fails it does not drip. Water comes out at the rate the plumbing can deliver, and it keeps coming until someone shuts it off.
A toilet supply line burst often happens when nobody is home or everyone is asleep. By the time it is found, water may have spread across the bathroom, under the baseboards and into the ceiling below. Here is why these hoses fail, what to do in the first minutes, how to replace one, and what to check afterward.
Why Toilet Supply Lines Fail
A supply line looks simple, and it is. A rubber or plastic tube inside, a braided jacket outside, a threaded nut on each end. Each of those parts wears out in its own way.
- Age. The inner tube is the part that holds the water, and it hardens and cracks over the years. The braided jacket hides this. A line can look fine from the outside while the tube inside is close to splitting. Many plumbers suggest replacing these lines every few years rather than waiting for a leak.
- Plastic nuts. Many cheaper lines and older fill valves use plastic coupling nuts. They crack if they are overtightened during installation, and they can also crack years later from stress that was put on them on day one. A cracked nut can let go all at once.
- Kinks and tight bends. A line that is too long gets looped or folded behind the toilet. One that is too short gets pulled tight. Both put strain on the tube and the crimped fittings at the ends.
- Corrosion. Braided jackets can rust, especially in a damp bathroom or where cleaning products get splashed. Once the braid frays, it stops supporting the tube.
- Pressure spikes. Water hammer and high street pressure keep hitting the weakest part of the system again and again. Often that part is a flexible hose.
- Poor installation. A joint that was not seated right, a missing washer, or a nut cross-threaded onto the valve may hold for a day or a year and then fail. Leaks that start right after new work are often traced back to the connection, not the hose itself.
First Steps When the Line Bursts
Speed matters more than anything else here. Every minute adds gallons to the floor and to the building materials around it.
Close the Stop Valve Behind the Toilet
The small valve on the wall or floor behind the toilet is the first thing to reach for. Turn it clockwise until it stops. If it is an oval handle that has not moved in years, it may be stiff. Use steady force, not a hammer.
If the Valve Will Not Close, Go to the Main
Old multi-turn stop valves seize, and sometimes the leak is at the valve itself. In that case go straight to the main shut-off for the house. In many homes it is near the water meter, in the garage, or where the line enters the house. It is worth finding it before you ever need it.
If water is coming through a ceiling, light fixture or wall outlet below the bathroom, stay out of that room and switch off power to the area at the breaker panel before anyone touches anything wet.
Then Deal With the Water
- Flush once to drain the tank, and sponge out what is left so nothing drips while you work.
- Pick up standing water with towels, a mop or a wet vacuum. Get it off the floor before it soaks in further.
- Take photos of the burst line, the floor and anything damaged, before you clean up too much. Keep the old hose.
- Check the room below if there is one. Look for stains, sagging drywall or water at the light fixtures.
If the water reached carpet, cabinets or a lower floor, it is time to bring in professional water damage restoration help to measure and dry the hidden areas. Wet materials that look dry on the surface often are not.
Replacing the Toilet Supply Line
Supply line replacement is one of the simpler plumbing jobs. You need an adjustable wrench, a towel, a small bucket and the new line. Measure the old one first, and check the thread sizes. Most toilet lines are 3/8 inch compression at the valve and 7/8 inch at the tank, but older fixtures vary.
Choose a Braided Steel Line
A braided toilet supply line with a stainless steel jacket is the usual choice. Look for one with metal coupling nuts, or at least reinforced ones, rather than plain plastic. Some lines are sold as burst proof toilet supply lines. These have extra reinforcement or a built-in check that cuts the flow if the hose ruptures. They cost more than a basic hose but are worth thinking about, especially for an upstairs bathroom.
Consider a New Stop Valve
If the old valve was hard to turn, leaked at the stem or did not fully stop the flow, replace it at the same time. A quarter-turn valve closes with one short turn of the handle, which helps a lot in an emergency. If the valve is soldered on or the pipe behind it is corroded, a plumber should do this part.
Installation Steps
- Shut off the water and drain the tank.
- Disconnect the old line at the tank first, then at the valve. Keep the bucket under it for the leftover water.
- Thread the new line on by hand at both ends. It should turn on easily. If it binds, back it off and start again so it does not cross-thread.
- Snug it with a wrench, about a quarter turn past hand tight on metal nuts. Plastic nuts on the tank side are usually hand tight only. Overtightening is a common cause of later failures.
- Leave a gentle curve in the hose with no kinks, and no pull on the fittings.
- Open the valve slowly, let the tank fill, flush a few times, and run a dry paper towel around both connections to check for moisture.
Check the connections again the next day. A small seep that shows up overnight is much easier to deal with now than later.
How Often to Check Supply Lines
Supply lines sit out of sight, so they are easy to forget. A simple routine helps.
- Look at them at least once a year. Check for bulges, rust on the braid, frayed strands, white mineral crust at the fittings or any dampness on the floor.
- Write the install date on a tag or a piece of tape on the line. Then you will not have to guess how old it is.
- Replace lines by age, not only when they leak. If you do not know how old a line is, treat it as old.
- Use a seasonal reminder. The EPA WaterSense Fix a Leak Week guide is a good yearly prompt to walk through the house and check every fixture.
A toilet water line leaking from the wall, at the valve rather than the hose, is a different problem. It can mean a failing valve or a leak in the pipe behind the drywall. That one should be looked at before the wall gets wet inside.
Other Supply Lines in the House
The toilet is only one of several flexible lines in a typical home. The same wear points apply to each.
- Sink faucets. Kitchen and bathroom sinks have two lines each, hot and cold. Hot lines tend to age faster.
- Washing machine. The fill hoses on a washer carry large volumes, and rubber ones are a well-known source of floods. Braided hoses and shutting the valves off when you leave on vacation both help.
- Refrigerator ice maker. The thin line behind a fridge gets pinched or kinked when the fridge is pushed back. Plastic tubing here is a frequent weak spot.
- Dishwasher and water heater. Both have flexible connectors that sit hidden for years.
When one line in a house turns out to be past its life, the others were often installed at the same time.
Damage Below: Ceilings and Subfloors
Water from a toilet water line burst goes down. On a slab, it spreads under flooring and into the bottom of walls. Upstairs, it soaks through the subfloor and into the ceiling of the room below.
Ceilings
Drywall ceilings hold water until they cannot. Watch for brown rings, bubbling paint and sagging. A sagging ceiling may be holding a pocket of water and can come down without warning. Keep people out from under it.
Subfloors and Wall Cavities
Plywood and particleboard subfloors absorb water and can swell, delaminate or stay damp under finished flooring for a long time. Insulation in the ceiling below stays wet too. Without proper drying, these hidden spaces are where mold remediation becomes necessary later on.
Belongings
If a lower room was hit, furniture, rugs and boxes may have to be moved out while the space dries. Our article on how restoration companies inventory your belongings explains what that process looks like, and the pack-out and contents services page covers moving items out for cleaning and storage.
A Small Part Worth Replacing
A new braided line costs little and takes a few minutes to put on. The damage from an old one that lets go can take weeks to dry out and repair. Check the lines in your home, replace the old ones and know where your shut-offs are.
For Del Mar homeowners dealing with water that has already spread, you can read more about our restoration team, see what local customers have said, browse more water damage articles on our blog, or start from the Del Mar restoration home page.