

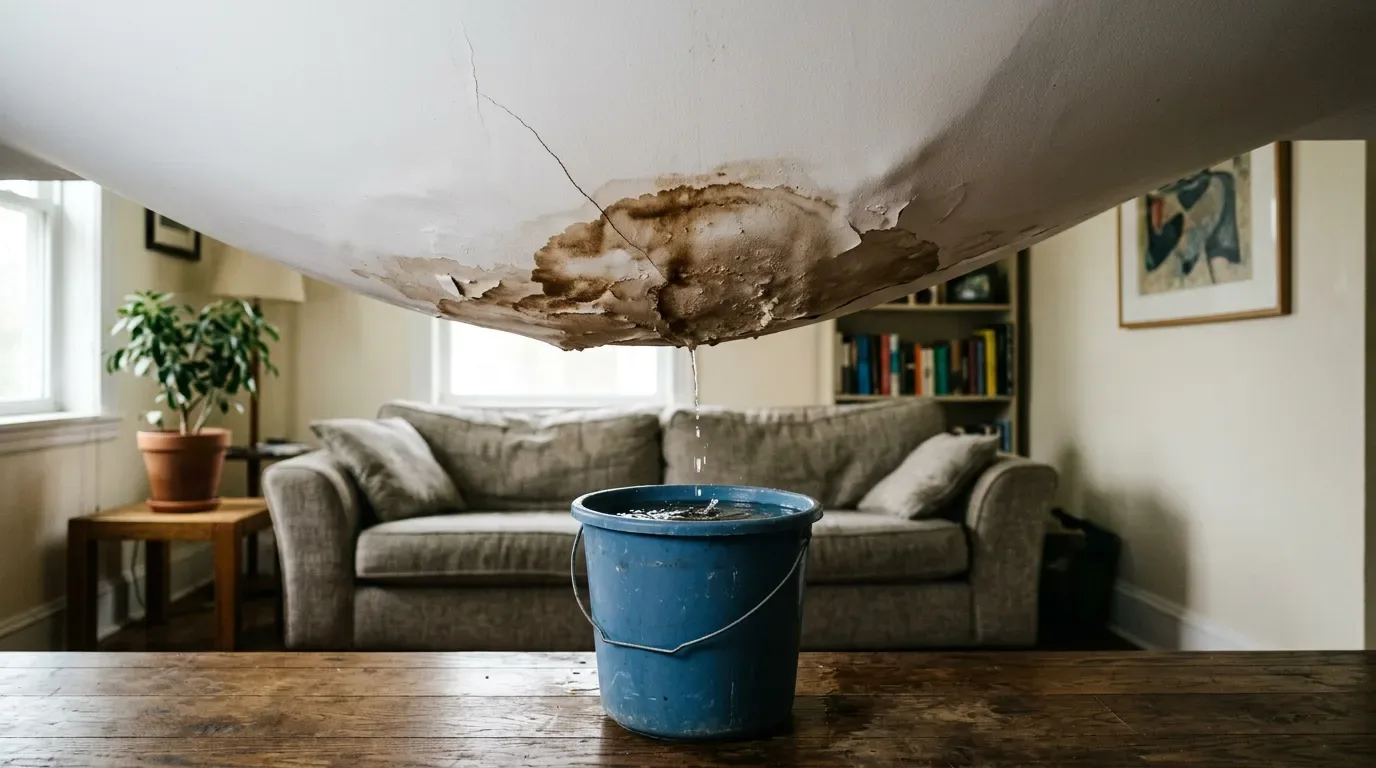
When a pipe gives way in the unit upstairs or the roof leaks during a heavy rain, the ceiling takes the water first. For some time it holds it and keeps it off your things. But what a ceiling can take is limited: the longer the water presses on it, the higher the risk that it gives way. So is water damage on a ceiling dangerous? It can be, and that is why the water needs to come out as early as possible.
If your ceiling has a stain or a bulge after a leak, the first minutes matter most. Three things need doing: make the room safe (power and water), limit the damage to your belongings, and record what happened. Below is a step-by-step plan for Del Mar homeowners: what you can do yourself, and when it is better to call for help.
Danger signs: what a wet ceiling tells you
The first sign of a flooded ceiling is damp patches and darkening on the surface, at the joints with the wall and in the corners. If a large amount of water has collected, the ceiling sags like a bag. Water often starts dripping out of a fixture opening before the ceiling visibly changes shape.
Once the water is stopped, move on to an inspection. Look at the ceiling in bright light, with a flashlight or a lamp plugged into another, dry circuit. Look for:
- Stains. Yellow or brown spots, rings, streaks along the seams and in the corners.
- Bubbling paint. Blistered paint, joint compound coming loose, fine cracks.
- Sagging over an area. Especially near a light fixture or in the middle of the room.
- A damp smell. If it stays for more than a day, it is a sign of hidden moisture.
Water rarely wets just one spot. It spreads across the structure above, gets into the seams, and can travel along a cable or a joist. So look not only at the stain but at the area around it, a foot or two out, at the corners and at the places where wiring and pipes run.
Water damage ceiling cracks: which ones are serious
A crack on a ceiling is in most cases a cosmetic defect in the finish. What makes it dangerous is not the width but the growth and the location. The danger of a crack is judged by several signs together, not by one: which layer it is in, whether it is growing, its shape, and what comes with it. Width alone tells you little.
- Cosmetic, or hairline cracks. They look like a thin web and appear in the layer of compound or paint because of changes in temperature and humidity. They do not threaten the structure.
- Cracks at drywall joints. They run along the joints between sheets and appear because the frame has deformed, the seams were taped badly, or the humidity in the room is high.
- Cracks that grow or open along a sag. On a wet drywall ceiling, a crack that widens, drops at the edges or drips means the sheet is soaking through and pulling off its screws. Keep people out from under it.
Cracks that keep growing, a ceiling that keeps sinking, doors that start to stick in their frames or a floor above that sags point to a structural problem, not just wet drywall. Get a pro to assess it before any repair. If the drywall keeps getting wet, find and remove the source of the moisture first. Otherwise the repair will have to be done again.
Can a leaking ceiling collapse?
A ceiling holds water for a limited time, depending on the material and how much water has collected. The load spreads unevenly, and at the lowest point the pressure on the seams and the fastening grows very fast. Under the weight of the water the ceiling can pull away from its fastening, and then the water pours onto the floor all at once, soaking furniture, electronics and finishes.
A drywall ceiling after a flood is the most deceptive kind. From below there may be only a stain, while inside the sheet has already gone soft. So judge it not by the color but by its strength and shape.
Keep people out of the room
Water plus electricity is the biggest risk. Even if it is "just dripping a little", the water may be getting into junction boxes, a light fixture or the wiring in the ceiling. If there are sparks, a burning smell, a large area sagging, or water running through a light fixture, do not try to handle it yourself. Leave the room and call emergency services.
- Take children and pets out of the area. Lay down dry mats or rags so nobody slips.
- Clear the space under the sagging section. Take away everything that can get wet or be ruined by water: furniture, electronics, rugs and other textiles, valuables. Even with the greatest care, some water may splash past the container.
- Cover the floor. Spread plastic sheeting or old towels and set out a wide basin or several buckets.
- Watch the ladder. Do not put a stepladder on a wet, slippery floor.
If a whole room has to be emptied, it helps to know how packing out and storing household belongings works, so your things are not left standing in a wet room.
Electrical risk: shut off the power first
Ready.gov's flood safety page advises not to touch electrical equipment if it is wet or if you are standing in water, and to turn off the electricity if it is safe to do so.
- Use the breaker, not the wall switch. If you can reach the panel from a dry spot, switch off the breaker, preferably every breaker for that room. If you do not know which one, switch off the main. Turning off the light with the wall switch is not enough: water may have reached the wiring above the ceiling or in the wall.
- Do not touch wet switches and fixtures. Leave the light fixtures, switches and the metal parts of a ceiling light alone, and never touch them with wet hands until the power is off.
- Do not turn on the light "to check". If the water was near a ceiling light or recessed lights, the contacts can oxidize and short out after everything has dried. Better a day without light than new wiring and the repair done twice.
- Leave flooded fixtures to an electrician. Fixtures that took on water are better not switched on even after the ceiling has dried. The inspection and the decision on replacing them should be left to an electrician.
If there is even a suspicion that water got into a fixture, an outlet or a junction box, keep the breaker off until everything has dried and been checked.
A water bubble in the ceiling: a controlled drain
Do not put off draining, even if the leak is small. The water still has to come out to take the pressure off the ceiling. You do not need special tools. You will need:
- A stepladder.
- A wide basin and several buckets.
- Old towels and plastic sheeting. To protect the floor and furniture.
- A screwdriver or an awl. To make a small hole for the water.
It is better to do this with two people: one works at the ceiling, the other holds the containers and swaps them as they fill.
- Turn off the power completely. Switch off the lights and the breaker in the panel, because you will be working next to wiring and fixtures.
- Find the lowest point of the bulge. That is where the weight of the water collects.
- Put a wide basin under it. Lay towels or plastic around it.
- Make a small hole at the lowest point. Stand to the side, not under the bulge, and start small: a big opening lets the water out all at once and can tear the drywall.
- Watch the level. Swap the containers in time so they do not overflow.
A pro is needed if the ceiling sags in several places, if the flooded area is large, or if there is no convenient access to the water. Until help arrives, do not try to push the water toward the edge or prop up the sag with anything: the load shifts, and a seam can split. Professionals use pumps to remove the water quickly; this is part of professional water damage restoration work.
When drywall must be replaced
On the finish, the rule is to remove only what no longer holds. A paint blister is opened with a knife and scraped back with a putty knife to a firm layer. If it is dark and damp under the blister, keep drying and do not apply compound. Plaster is checked by tapping: if it sounds hollow or crumbles under a finger or a putty knife, remove it down to a solid base.
With drywall the rule is stricter. You can get by with drying if:
- The sheet is flat. No sag and no waves.
- The paper holds. It is not peeling, the edge has not gone soft.
- The seams are intact. They have not swollen, and there are no cracks along the tape.
- It stays clean after drying. No damp smell after full drying, no black spots appearing.
A section needs to be replaced if:
- There is a sag or a belly.
- The gypsum is soft. It dents under a fingernail, the paper comes away.
- The seams have cracked and ridged.
- Mold has appeared. Or water stood inside the assembly.
- The screws have sunk deeper. The sheet got soaked and the load on it changed.
A simple test once the ceiling is dry: press lightly with your palm next to the stain. If you feel springiness, a creak or softness, or the surface moves, cosmetic repair is not an option.
The cut is made along the framing, so the new piece has support around its edges. Cutting in the middle of a sheet with no backing almost guarantees a crack along the seam later. If the framing is wet, let it dry and check it for rot or rust. Sometimes it is simpler to replace part of the frame than to chase a ceiling that keeps moving.
Drying the insulation and the cavity above
With the power off, mark a rectangle out to the nearest framing members, cut the sheet out carefully, take out the insulation and any plastic layers, if there are any, wearing gloves and a mask, and look at what is inside. Let the cavity dry, and treat it with an antifungal product if needed. Check the frame: the joists should not be bent, and the fasteners and connections should not be loose.
Ignoring the cavity is one of the typical mistakes. If water was inside, the space above has to be opened and dried, not just the underside touched up. Drying the visible part is half the job; the other half is drying what you cannot see.
- A dehumidifier works best. When the wetting is heavy or the ceiling has hidden cavities, a dehumidifier is the most effective. It pulls moisture from the air, and the air pulls it from the materials.
- Heat moderately. A normal room temperature, around 70°F, is usually enough. Overheating, 85°F and above, can crack the compound and warp the drywall.
- Move the air. Air out the room several times a day. Point a household fan so it moves air along the ceiling instead of blowing at one wet spot.
- Measure the humidity. A simple hygrometer is the best control. In the room, aim for below 60%, ideally 30–50%. If it stays at 70% or more, natural drying will drag on for weeks.
A heater without ventilation raises the temperature but does not carry moisture outside. So the combination works like this: a dehumidifier or airing out, plus moderate heat, plus moving air.
Mold after a ceiling leak
After a flood, mold may not show up right away. The ceiling often looks normal, but moisture stays in the pores of the plaster, in the joints, under the drywall or in the corners. Antifungal treatment is needed if there is at least one of these signs:
- Visible growth. Dark dots, a grayish film, fuzzy spots.
- A persistent musty smell. Even after drying and airing out.
- A long or hidden leak. The leak went on for a long time, or water got into cavities.
- Wet corners. The corners, the ceiling-to-wall joints, the area near the vents got soaked.
A treatment only works together with proper drying. If you seal something wet under primer or compound, you simply lock the problem in. If the smell comes back a few days after the first round, or dots show through, that points either to leftover moisture or to a cavity with mold under the drywall. Chemicals alone will not fix that: the assembly has to be opened and dried inside. Bleach is not a universal method either: it can whiten a stain but does not reliably work deep in the material, and it carries risks for breathing and for metal.
If growth is already visible, see how mold remediation in a home is handled, and read about the health risks of living with mold.
Record the damage before you clean up
If the water comes from a unit above, go up and ask the neighbors to shut off the water and check the washing machine, faucets, supply lines and the toilet tank. If nobody is home, contact the landlord or the HOA.
Do not rush to clean up. First record all the damage in photos and video: a wide shot of the room, close-ups of the stains on the ceiling, streaks on the walls, wet outlets and fixtures, with the time showing on your phone. This is basic evidence. Do not hurry to strip the finishes "so it dries" either: the record comes first, and only then the preparation for repair. If the damage is serious and electronics and finishes have suffered, it makes sense to call your insurance company and have an adjuster assess it.
To learn who would be working in your home, you can read about our restoration team or see what local homeowners have said. More articles on leaks, drying and mold are on our water damage and restoration blog, and the main services are listed on the Del Mar restoration company home page.