

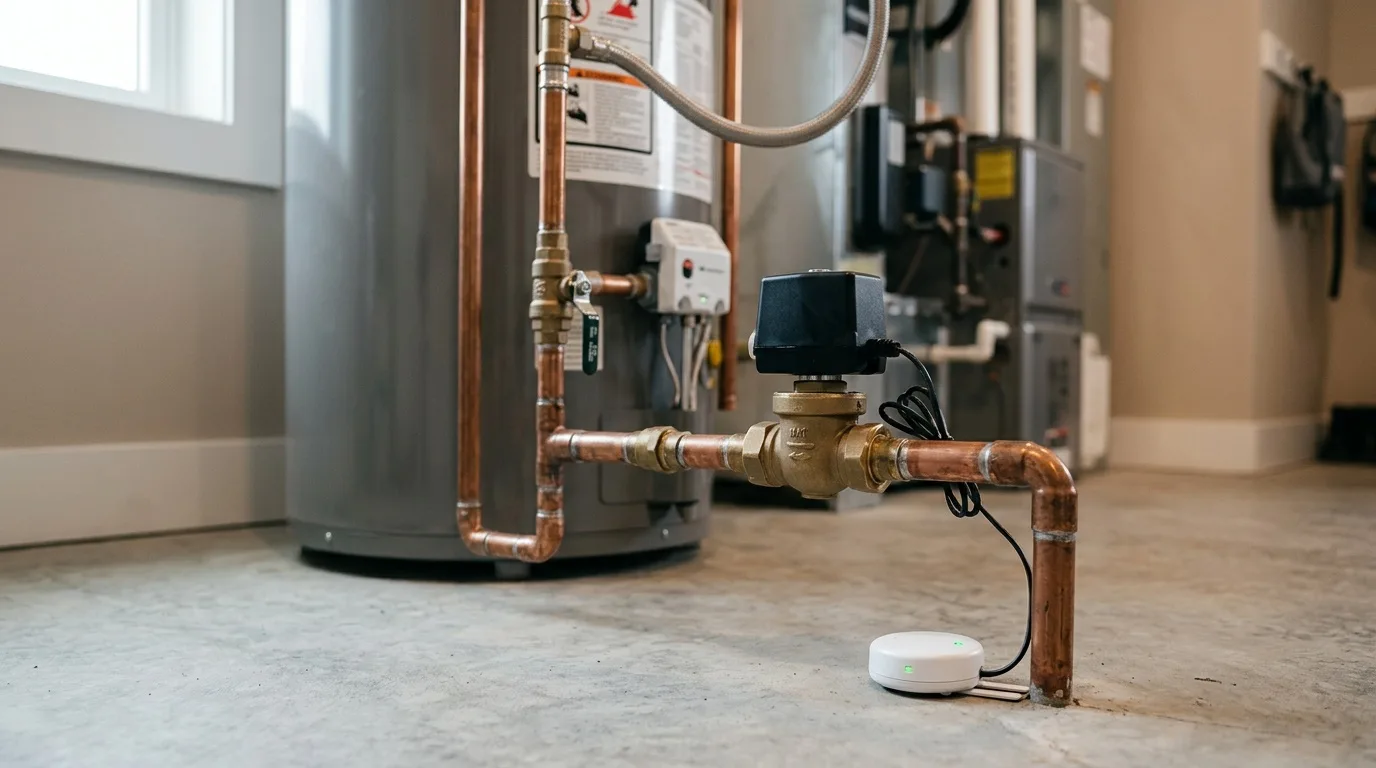
Many people mistakenly believe that a leak protection system is an expensive toy that sits idle most of the time and brings no real benefit.
To dispel this myth, just count what a repair would cost if your home in Del Mar flooded. A supply line that lets go while nobody is home can soak the subfloor, the drywall and the cabinets within hours, and in a condo the unit below as well.
After that the system no longer looks useless, and installing it looks justified against the possible costs. Below we go over what a water leak sensor and an automatic water shut off valve do, what you need for such a system and how to set it all up.
Why a Leak Protection System Is Needed
Many think such protection is needed only in large houses with many bathrooms.
That is not so. Protection makes sense in any home. Such a system will help if:
- A supply line bursts. Faucets, toilets, the dishwasher and the refrigerator ice maker are connected with these flexible hoses. Over time the hoses wear out and start to leak.
- A drain gets clogged. A sink or tub has a plastic trap. It can clog, and a sink left running then overflows.
- A hose tears. A washing machine is most often connected with a rubber hose. It may not withstand pressure surges in the system, or it may dry out over time and burst.
These failures can happen at night, or when everyone is at work or on vacation. Of course, you can install several valves or simply shut off the water to the whole home. But doing that several times a day is tiring.
It is better and more reliable to install a leak protection system. Of course, it will not save you from wet floors - part of the water will still end up on the floor. But it can protect the finishes, the cabinets and the subfloor.
If water has already reached floors and walls, the cleanup is a separate job; here is how water damage restoration works.
How Such Systems Work
Any of them consists of ball valves, a controller and leak sensors. The sensors are installed where water is likely to escape - on the floor or in the floor. When a sensor detects a leak, it signals the controller, which passes the task to the ball valves to shut off water in the supply system.
There are wired and wireless systems. Their principle of operation is identical; the only difference is how the signal is transmitted. The wireless version is somewhat more expensive, but it is easier to install than the wired one. A system can also be fitted with a radio relay and a cellular module, through which it communicates with a phone. Besides shutting the valves automatically, it can send a text message or place a voice call to pre-programmed phone numbers of everyone concerned. The device can be integrated into a smart home system.
Spot Sensors, Flow Monitors and Shut-Off Valves
It helps to separate three kinds of devices:
- A spot sensor on its own. It notices water and raises an alarm. Without a valve it can only warn you of a leak, but it will not do anything by itself.
- An automatic shut-off valve. This is the most important element of the system. A sensor paired with a shut-off valve does not just warn - the valve closes the water in the problem zone or in the whole home.
- A flow monitor. According to EPA WaterSense, leak detection and flow monitoring devices can help identify leaks or alert you to irregular water use and reduce water damage. A flow monitor sits on the main water line and watches how much water moves through it. Water running for hours when nobody is using it, or a sudden large flow, points to a leak even where there is no sensor, including a slow drip inside a wall, and many monitors can close the main valve themselves. The EPA WaterSense leak-check guide is a good place to start.
What You Need to Build the System
1. A valve with a motorized actuator. It lets you shut off water in the problem zone or in the whole home. Here everyone decides for themselves: save money and take one motorized valve on the main line, or install more valves - one for each room.
A valve for the whole home will shut the water off completely in case of a leak; you will not be able to wash your hands in another bathroom or in the kitchen until the leak is fixed. Several valves, one per room, solve this problem and close only the zones with the break.
The most convenient are battery-powered actuators. If there is an outlet nearby, you can take an actuator that plugs into it. Valves with a motor that runs on line voltage have another problem, though - safety, and no way to close the valve during a power outage. By Murphy's law, the power will go out at the worst possible moment. So some owners prefer to pay a bit more for a valve with a low-voltage motor.
2. A leak sensor. It is the one that notices water and triggers the alarm.
If there are several potentially dangerous spots, put a sensor in each. For example, under the kitchen sink, under the tub, the bathroom sink, the toilet and the washing machine. The more sensors there are, the sooner water reaches one of them and the system responds. A sensor on the floor next to the water heater makes sense too.
But know the limit. If the bathroom is small and everything is close together, one sensor may do.
3. A hub. It is required to link the sensor and the valve, set the trigger logic, schedules and various automations. The hub watches over everything on its own; it can sound an alarm on a speaker or send a notification to a smartphone.
How the Sensor Itself Works
A wired flood sensor is as simple as it gets: a wire, a housing and a fiberglass board with two contacts. The contacts get wet, resistance drops, the controller understands this and shuts off the water.
Most sensors have a housing that protects against accidental splashes. Some trip only when a thin film of water covers the whole sensor area - roughly a couple of teaspoons of water.
Wi-Fi and Power
Zigbee sensors are more stable in a network; Wi-Fi is easier to set up. A Wi-Fi sensor connects directly to the router without extra devices. Zigbee needs a hub, and some radio sensors need the maker's own hub.
A common rule of thumb: for three or more sensors take Zigbee - cheaper and more stable. For one or two sensors Wi-Fi is enough. If you already have a smart home, choose a compatible sensor.
On power: choose models with a low-battery indication, so you get a notice before replacement is due. Some controllers store energy for working and closing the valves after the batteries are fully drained - that is, if an accident happens, the system will shut off the water even with dead batteries. When the controller runs on external power, wireless sensors are polled constantly. On battery power, the response to a sensor getting wet may follow with a small delay.
How to Install the System
The main advantage of the surface-mounted option is that it can be added to a finished home. Nothing has to be broken, routed or drilled. Before buying the equipment, make sure there is enough room for it.
- Install the valve actuator. The actuator is universal and fits most ball valves with a lever or butterfly handle. A mounting clamp is fitted in front of the valve; it is held by screws. Then the motor itself hooks onto the valve lever it will control. For reliability, you can also tie the lever and the actuator together with a zip tie.
- Place the leak sensor. Pick a spot where a leak can happen, for example under a toilet, a sink or a tub. Note: if the floor has a slope, the sensor must go at the lowest point. Otherwise water will reach it late. A level app on a phone will help find the slope.
- Connect the hub. The system works without wires. The sensors, actuator and hub are not tied to each other. The gateway can be placed in the next room, wherever convenient.
A valve cut into the pipe is a different matter. Wired systems are easier to plan during a remodel, and an in-line valve means plumbing work - a job for a licensed plumber, who will pick a spot on the main line. The wireless sensors can simply be laid in the places where flooding is possible: one under the sink, another under the washing machine, a wired one under the tub.
How to Set Up Leak Protection
The steps will vary depending on the set of components. But the rough sequence is this:
- Connect all devices to the hub. Put them into pairing mode one by one and turn on search mode in the hub.
- Choose a room and a name for each device.
- Set up the sensor. For example, name each sensor by its spot, such as under the kitchen sink.
- Set up the automation. For example, close the valve when any sensor detects water. You can set different conditions for day and night.
- Add extra actions. For example, a smartphone notification or a sound alarm on a leak. Devices can also be linked to a smart speaker to check their status or shut off the water by voice.
Limits: False Alarms and Slow Leaks
There are three levels of false-alarm protection:
- Basic - trips on any contact with water.
- With filtering - ignores condensation and brief splashes.
- Advanced - algorithms for identifying a leak more precisely.
For bathrooms and utility rooms, choose models with condensation protection. Basic sensors may trip in heavy condensation. The fix: put the sensor on feet or in a place without direct contact with steam.
And the other side: a sensor reacts only after water reaches it. A slow drip inside a wall may not get to it for a long time, and that is how hidden moisture turns into a mold remediation job later.
Even a system that closes the water quickly does not save you from wet floors: part of the water will still be on the floor. If a leak was found, dry the area and check the walls and floor - do not assume the valve took care of everything.
Maintenance
- Turn the valves from time to time. To prevent ball valves from seizing, some systems turn them automatically on a schedule.
- Test the sensors. Most models have a test button: a signal should sound and a notification should arrive.
- Watch the contacts. The main enemy is contact corrosion. Wipe the sensor when installing it.
- Replace batteries on time. After the batteries die, some controllers let you open the valves once with a button if you urgently need water, but then the batteries have to be replaced.
Checklist Before Buying
- Installation spot - bathroom, kitchen, utility room, water heater.
- Communication protocol - Zigbee for a smart home, Wi-Fi for simplicity.
- Compatibility with the ecosystem you already use.
- False-alarm protection - decide whether you need it.
- Insurer discounts - some insurers ask about leak devices; ask yours directly, without counting on any particular outcome.
What It Comes Down To
Leak protection is an important system that saves nerves, time and money. It can catch a starting flood in time and take the necessary measures by itself. Preventing an accident is much cheaper than repairs and buying new things - furniture, appliances, decor - ruined by a flood.
A surface-mounted system goes into a finished home without complex changes and is set up quickly. It can be scaled and adjusted to your needs with extra sensors. An automatic water shut off valve for homes is not the same as a spot sensor, though - decide which of the two you actually need.
If a leak has already done its work and belongings need to be moved out during drying, see our pack-out and contents services and how belongings are inventoried before moving. You can read more about our restoration team, see what Del Mar homeowners say, browse more articles on our blog or go back to our restoration home page.